Our Secret Recipe for Flawless Fondant Cakes with Crisp Edges
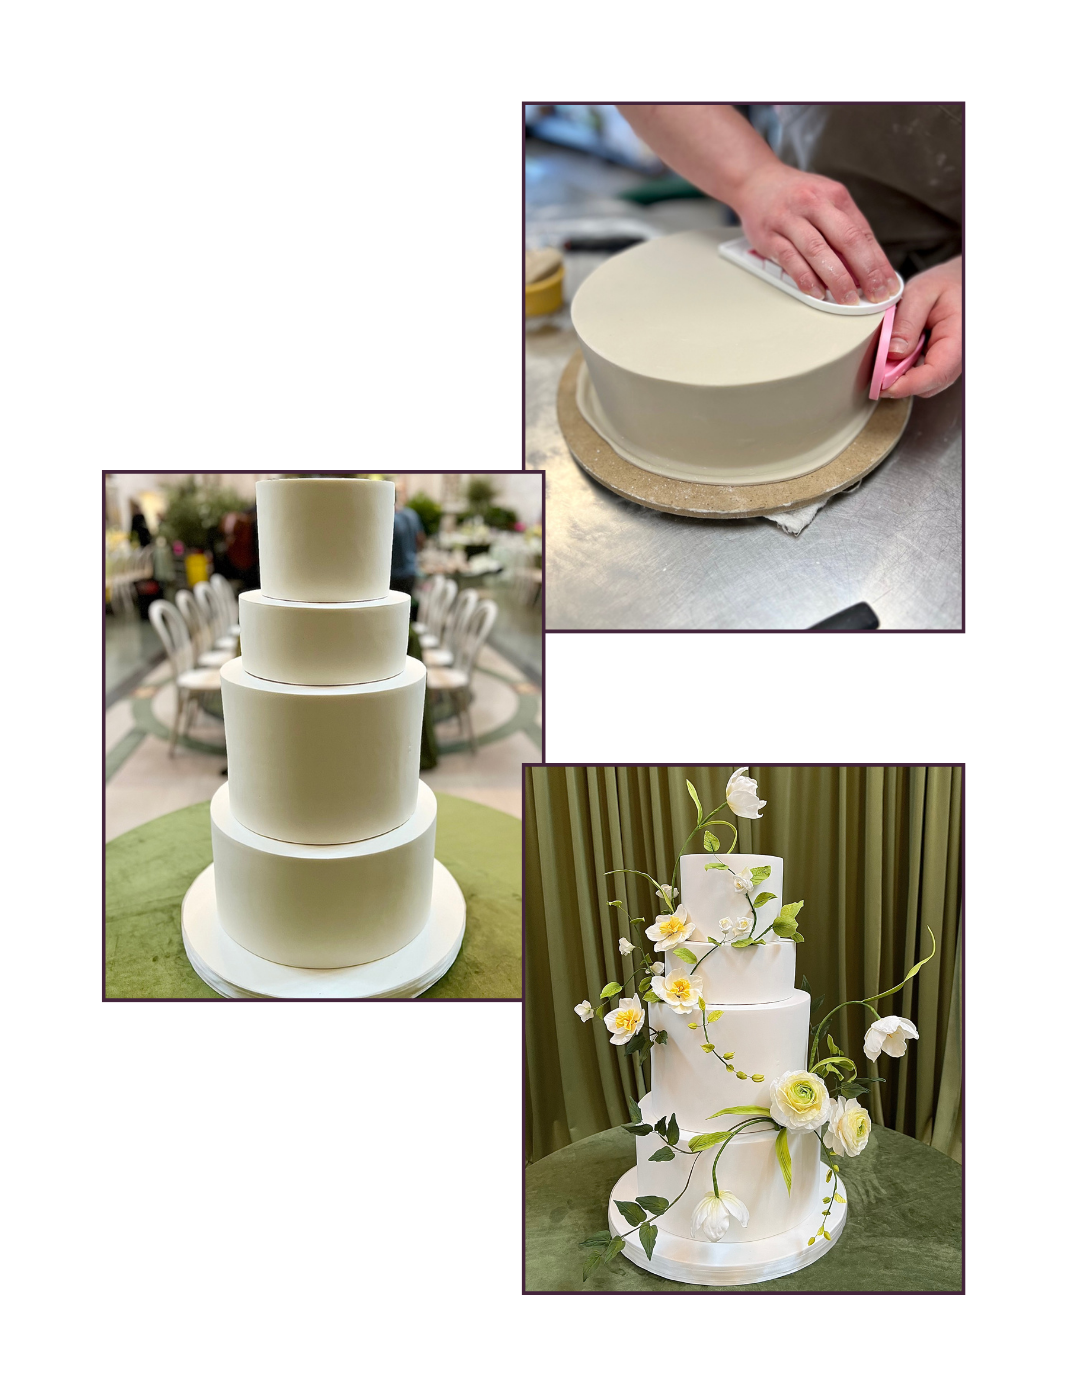
Does your fondant get dry and crack before you can get that perfect sharp edge? Our favorite fix for dry, cracking fondant is: adding a little bit of modeling chocolate before rolling it out.
The fondant/modeling chocolate mix stays pliable longer to help achieve an incredibly crisp corner. And you only need about 1 tablespoon of modeling chocolate for every pound of fondant!
Modeling Chocolate Recipe
Adapted from Colette Peters
The workability of modeling chocolate is very similar to clay. Once you knead it for a little while it forms a workable dough that can be used to create anything from figurines to large, sculpted cakes. The advantage of modeling chocolate is the ability to work on your project for long stretches of time without it drying out or forming a seam that you can’t smooth out. You can even leave a project overnight and go back to it the next day.
YIELD: about 5 cups
INGREDIENTS
3.125 lb white chocolate
0.82 lb light corn syrup
INSTRUCTIONS
Melt chocolate in the microwave in a microwave safe bowl. We use the melt function on our microwave which works amazingly to melt it at a steady pace without overheating the chocolate. Stir after one minute and then after every 30 seconds to ensure an even melt. Once you get a sense for how quickly your microwave melts the chocolate you can adjust the timing accordingly. Overheating the chocolate will cause it to seize up so it's better to go slow and steady than to overdo it.
Microwave the corn syrup in a microwave safe bowl until it is warm to the touch. Usually about 30 seconds on melt will do the trick. If you touch the chocolate and the corn syrup they should be about the same temperature, which is close to body temperature.
Combine the melted chocolate and corn syrup and stir well with a rubber spatula.
Turn the mixture out onto plastic wrap and form it into a disk. Wrap the entire disk in plastic wrap.
Let rest for an hour.
Knead the modeling chocolate mixture until smooth. If it is still a little too warm to fully come together, wrap it for another 30 mins and knead again.
You are looking for a smooth consistency that is easy to work with. If your modeling chocolate is lumpy, you may have overheated the chocolate and caused it to separate. Try using your microwave at a lower setting the next time you make it. If your microwave is particularly testy you can also use a double boiler to melt the chocolate.
Magic Fondant Recipe
Fondant/Modeling Chocolate Mix
Does your fondant get dry and crack before you can get that perfect sharp edge? Our favorite fix for dry, cracking, fondant is adding a little bit of modeling chocolate before rolling it out. The fondant/modeling chocolate mix stays pliable longer and helps achieve an incredibly crisp corner.
INGREDIENTS
1 pound fondant (we use Fondx brand)
1 tbl modeling chocolate
INSTRUCTIONS
Knead your modeling chocolate so warms up into a smooth dough
Add the modeling chocolate to the fondant and combine until smooth
Roll out your fondant as normal and cover your cake
Enjoy a little extra time before your fondant starts to dry out and crack 🙂
NOTE: The ratio for this is very loose. We usually just cut off small bits of modeling chocolate to add to the fondant as we work.
Want to learn exactly how we cover our cakes? Check out our Covering Cakes with Fondant tutorial!
You can download a printer-friendly-version OF THis recipe for your kitchen HERE:
READY TO GO FURTHER?
Learn more studio tricks that my team and I use every day in my Online Tutorials. For more tips like this delivered to your inbox, subscribe to The Cake Break, our once-per-month newsletter for cake decorators and artists.


